How To Edit Photos On iPhone Using The Built-In Photos App
- Get link
- X
- Other Apps
How To Edit Photos On iPhone Using The Built-In Photos App
Posted by Kate Wesson |
Do you want to learn how to edit photos on iPhone? The simplest way is to use the editing tools of the built-in Photos app. From one-tap edits to advanced color and exposure settings, you can enhance your images without leaving your photo library. In this tutorial, you’ll discover how to edit pictures on iPhone using the built-in Photos app. Read on to discover how to turn your ordinary photos into stunning edits!
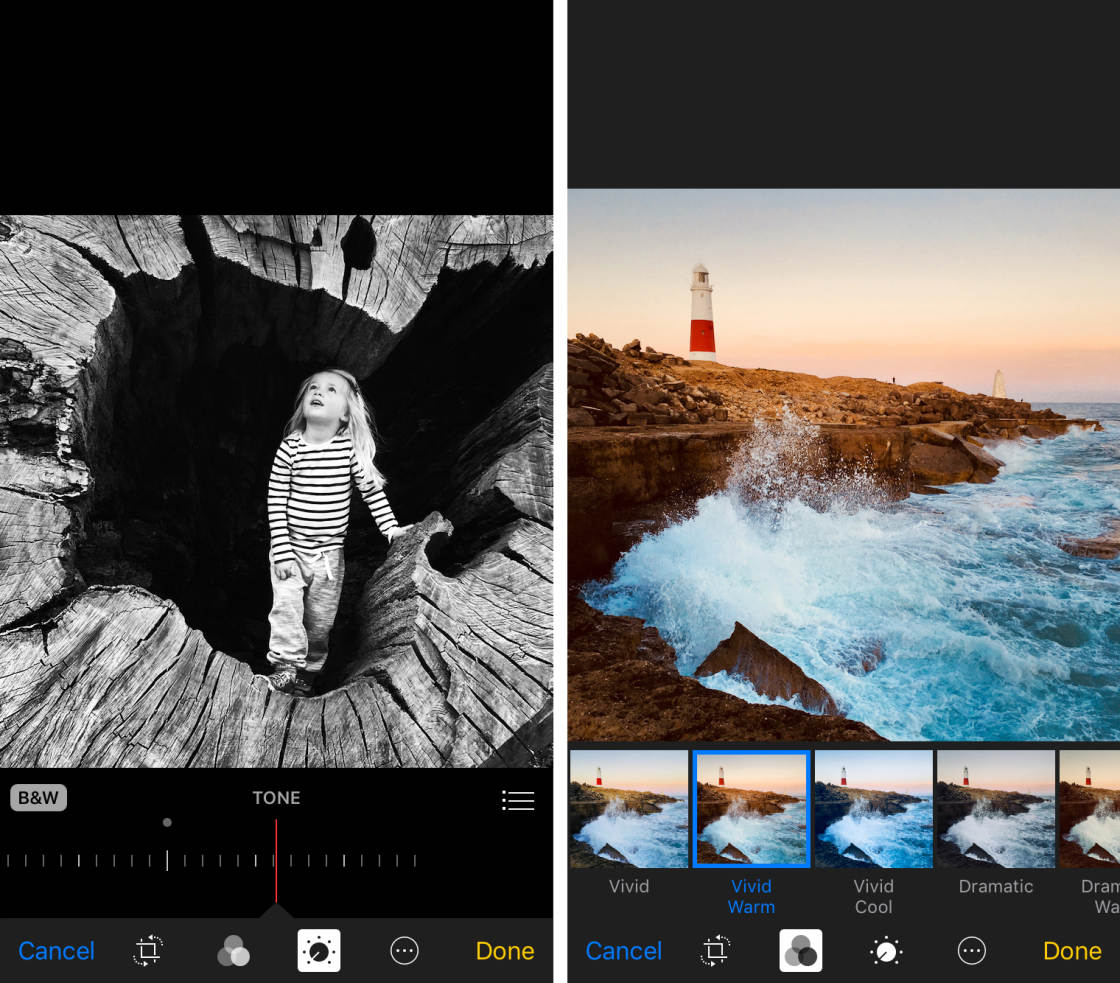
Table Of Contents: How To Edit Photos On iPhone
Click any title link below to go straight to that part of the tutorial.
1. Open The Photo Editing Tools
2. Crop
3. Rotate
4. Auto-Enhance
5. Filters
6. Light, Color & B&W Adjustments
7. Edit Live Photos
8. Edit Portrait Mode Photos
9. Revert To Original Photo
10. Benefits Of Using The Photos App For Editing
11. Limitations Of The Photos App
2. Crop
3. Rotate
4. Auto-Enhance
5. Filters
6. Light, Color & B&W Adjustments
7. Edit Live Photos
8. Edit Portrait Mode Photos
9. Revert To Original Photo
10. Benefits Of Using The Photos App For Editing
11. Limitations Of The Photos App
1. Open The Photo Editing Tools
Accessing the editing tools in the Photos app is easy. Open the image you want to work on, then tap Edit at the top right.
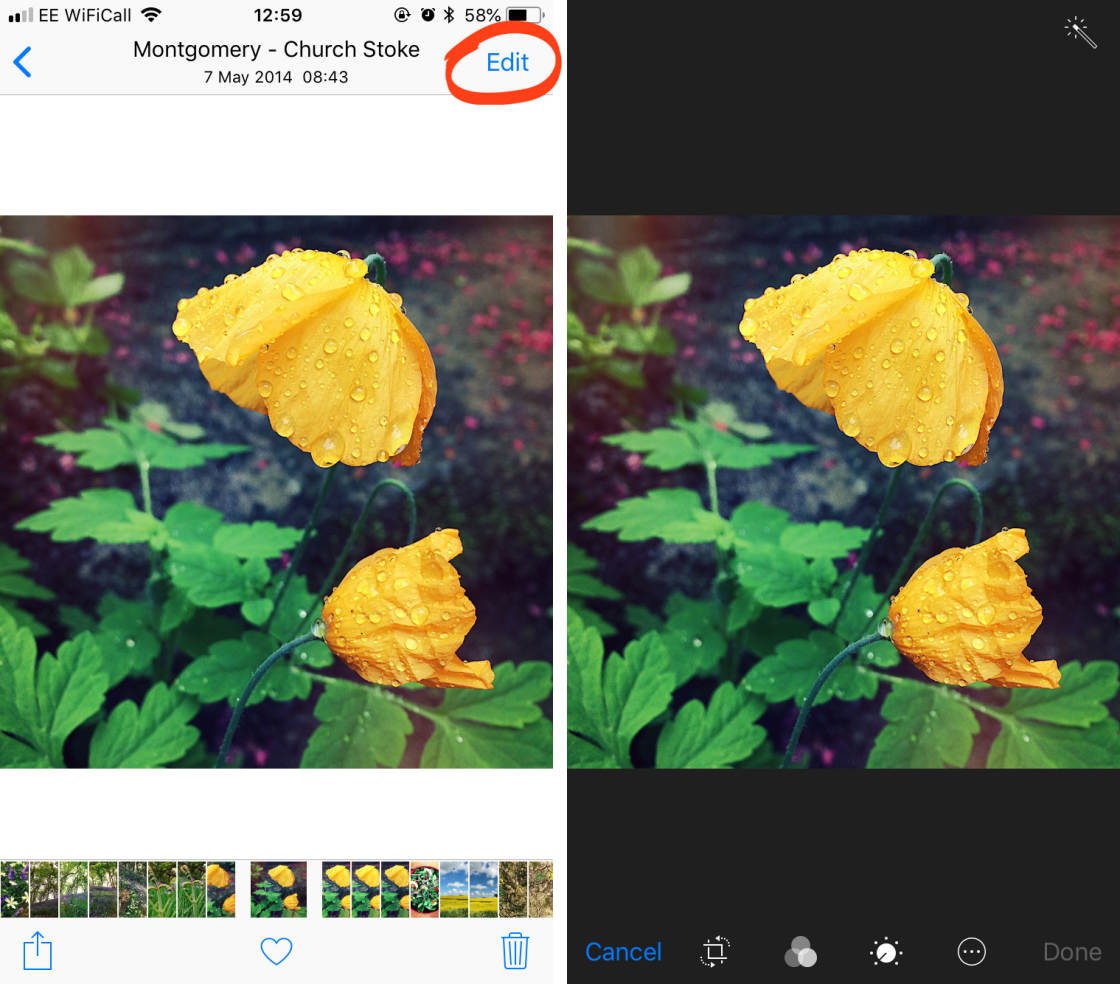
In Edit mode, you’ll see a row of editing tool icons at the bottom of the screen, and a wand icon at the top right.
Read on to discover how to edit photos on iPhone using use each of these editing tools.
2. Crop
The Crop tool lets you remove the edges of your image. Cropping your photo is great for getting rid of distracting elements from the edges of the frame. This results in a cleaner, simpler image with stronger visual impact.
You may wish to crop your image to improve its composition. For example, cropping can help you create better symmetry or apply the rule of thirds after taking your photo.
Cropping also allows you to zoom in on a distant subject. But be careful not to crop too much of the photo away, as this can result in a small, poor quality image.
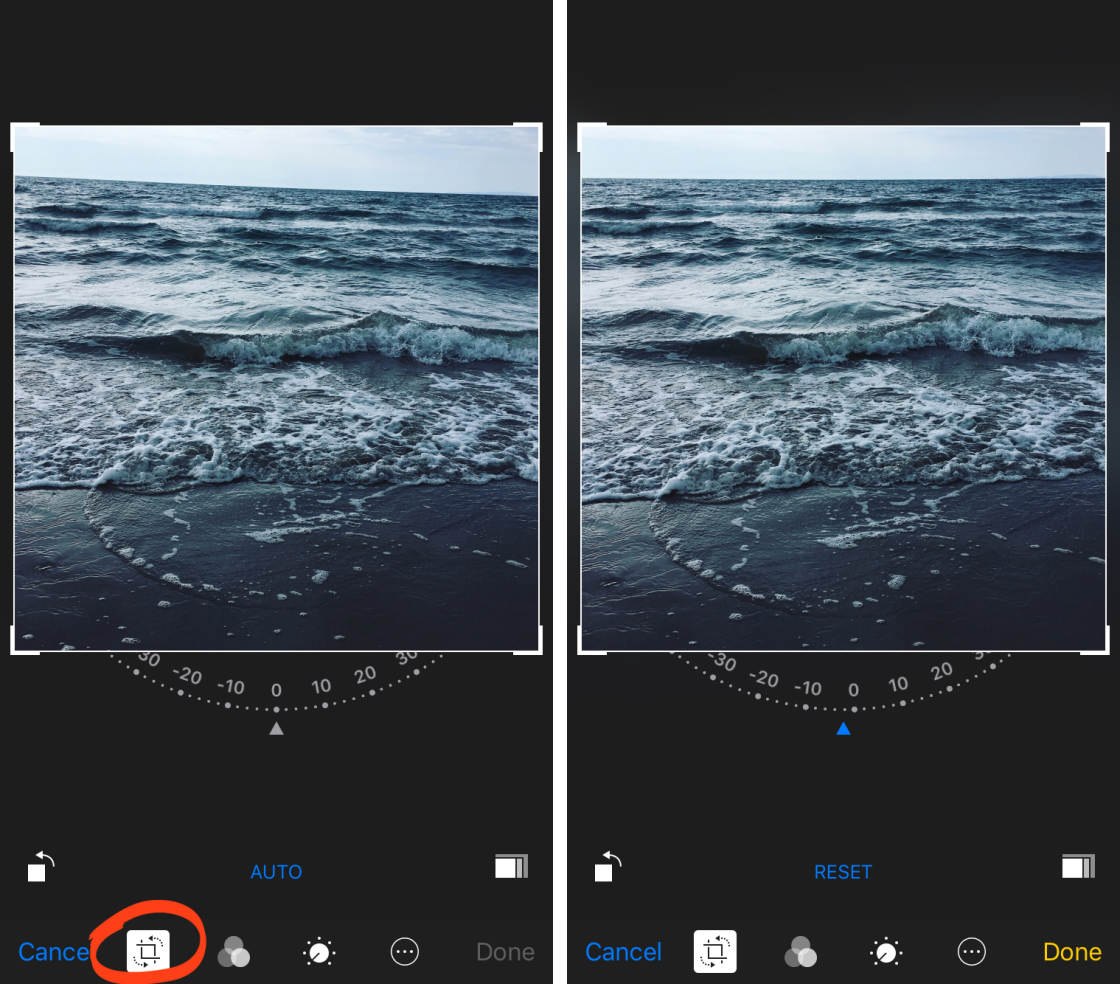
In Edit mode, tap the Crop icon (square with arrows) at the bottom of the screen.
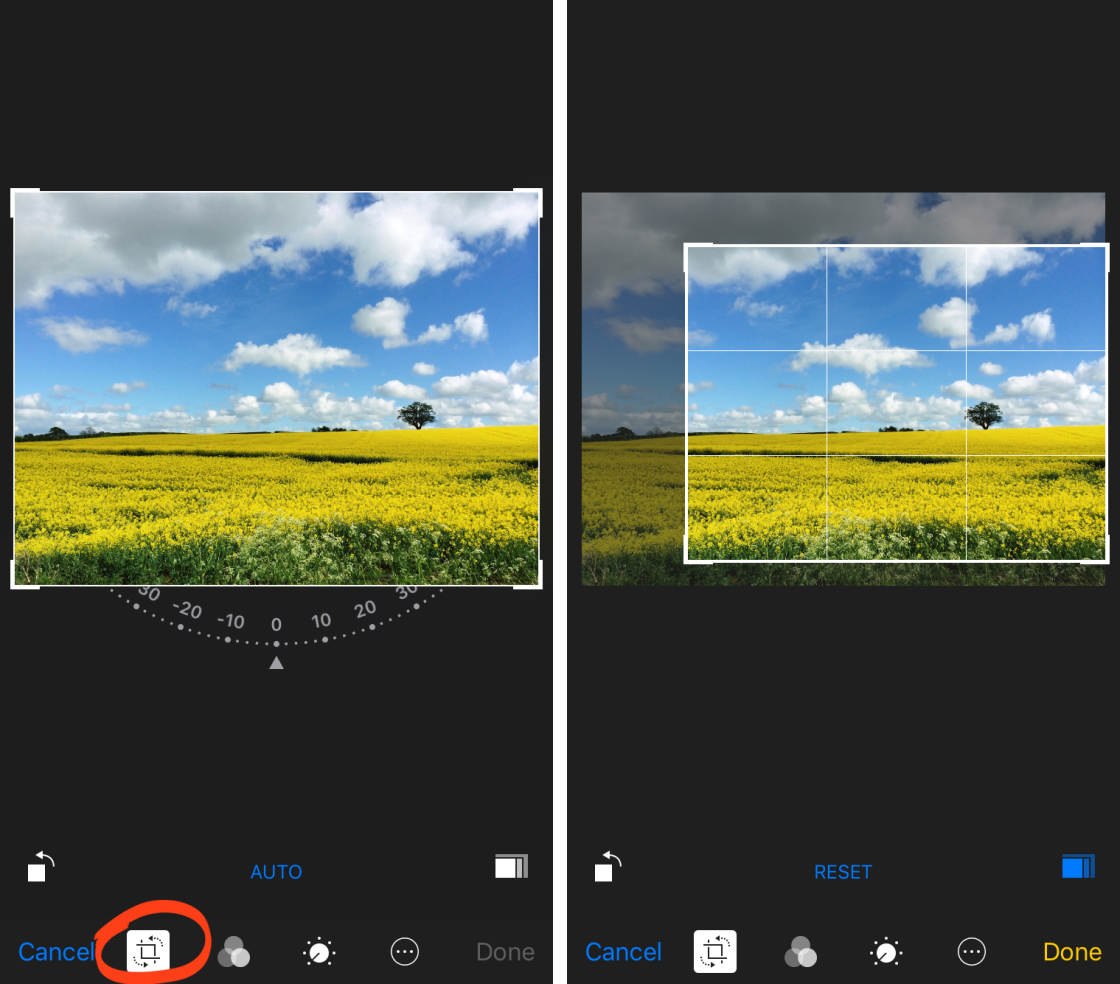
Drag any corner or edge of your image to crop out the areas you no longer want to keep. If you crop in too far, pinch inwards with two fingers to bring more of the image back into the frame.
Sometimes you might want to crop the image to a specific aspect ratio. For example, square, 3:4, 5:7, etc. Tap the Aspect Ratio icon (overlapping rectangles) near the bottom right of the screen. Select the ratio you want to use, then crop your image by dragging the edges of the frame.
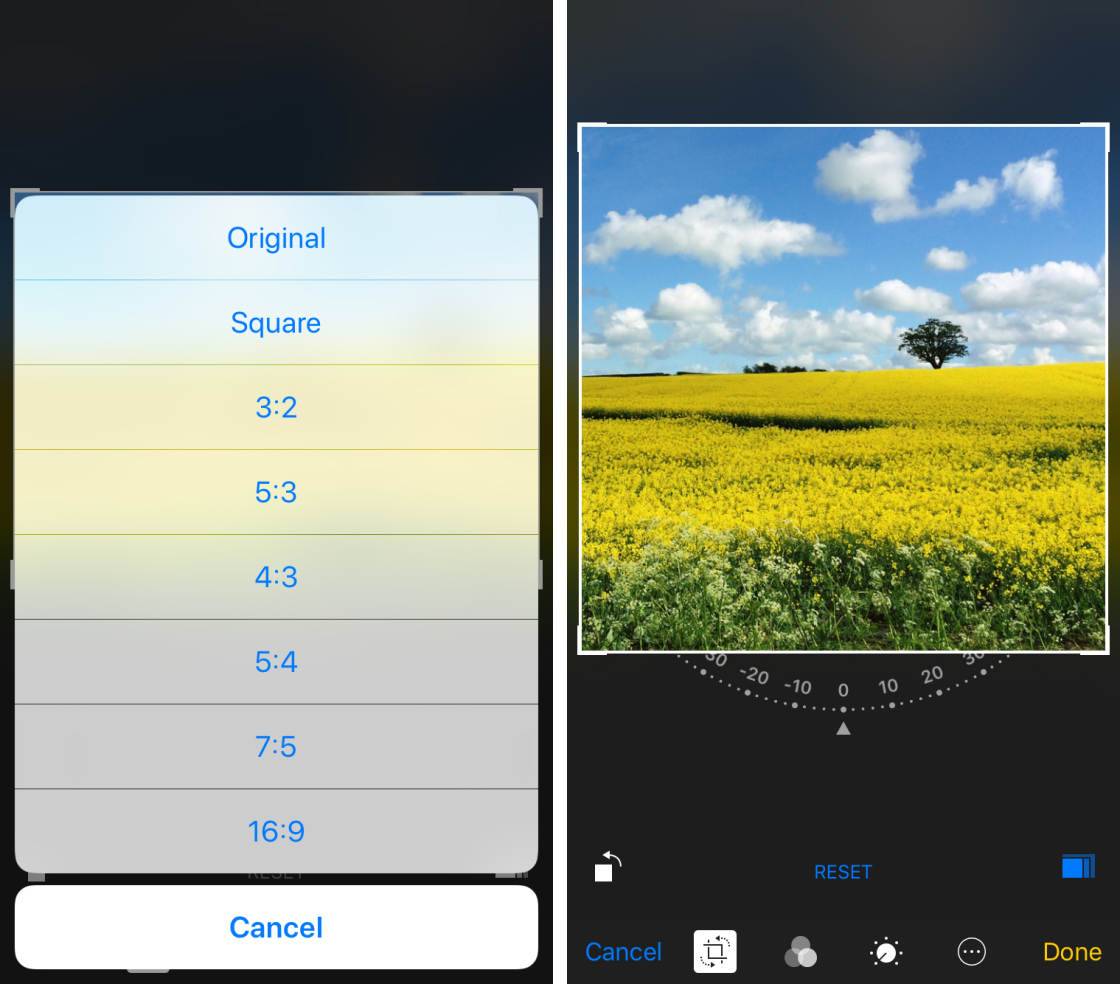
To return to free cropping mode where you’re not restricted by any aspect ratio, tap the blue Aspect Ratio icon so it turns white.
You can cancel the applied crop at any time by tapping Reset beneath the photo.
When you’re happy with the crop, you can keep Edit mode open to apply further edits, or tap Done to save the changes. If you don’t want to keep any of the edits that you made, tap Cancel.
3. Rotate
The Rotate tool has two options for rotating your photos. You can rotate 90 degrees at a time, allowing you to switch between vertical and horizontal orientation.
Or you can free-rotate a few degrees at a time. This is great for straightening photos where you didn’t hold the camera level when shooting.
In fact, the Photos app automatically detects if your image isn’t level and rotates it for you. This is fantastic for ensuring the horizon is level in your landscape photos.
To access the Rotate options, ensure you’re in Edit mode, then tap the Crop icon (square with arrows).
If the Photos app detects that the photo isn’t level, it will apply automatic rotation to straighten it up. If you don’t want to keep this rotation, tap Reset beneath the photo. Tap Auto to reapply the automatic rotation.
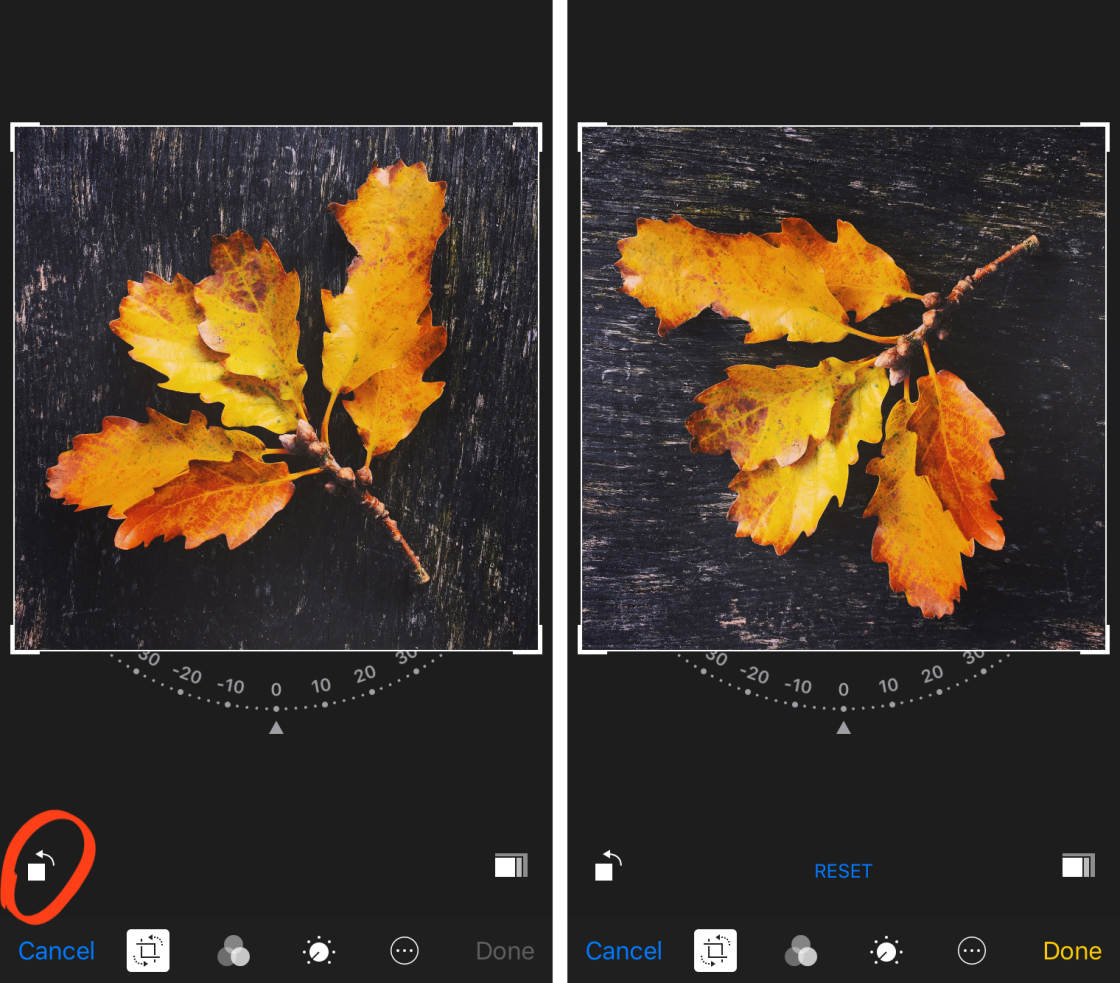
To rotate the image 90 degrees at a time, tap the Rotate icon (square with left arrow) near the bottom left of the screen.
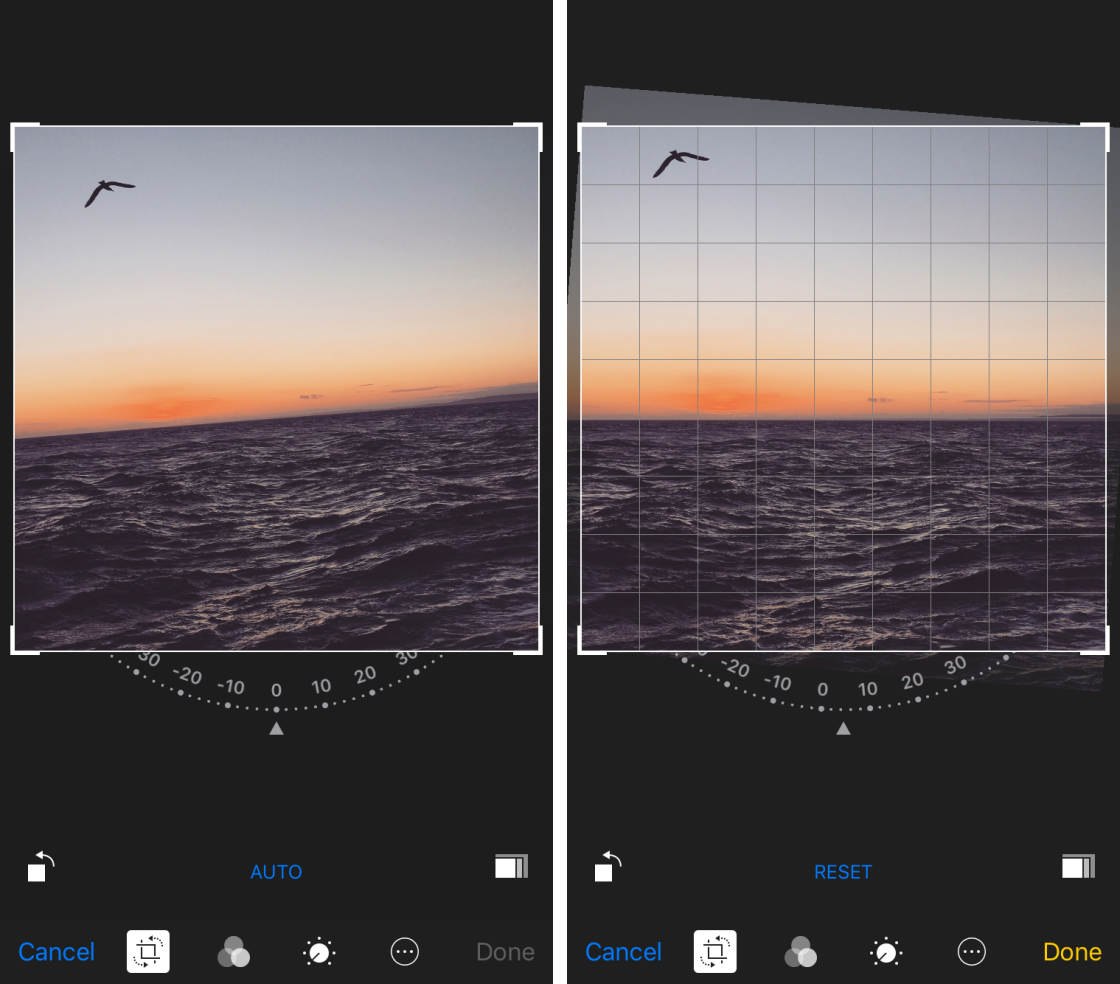
To free rotate the image a few degrees at a time, drag the Rotate wheel beneath the image. When you use this option, you’ll notice a grid appear over your photo. Use the gridlines to help you get your horizon or other elements in the image level.
When you’re happy with the rotation, keep Edit mode open to apply further edits, or tap Done to save the changes.
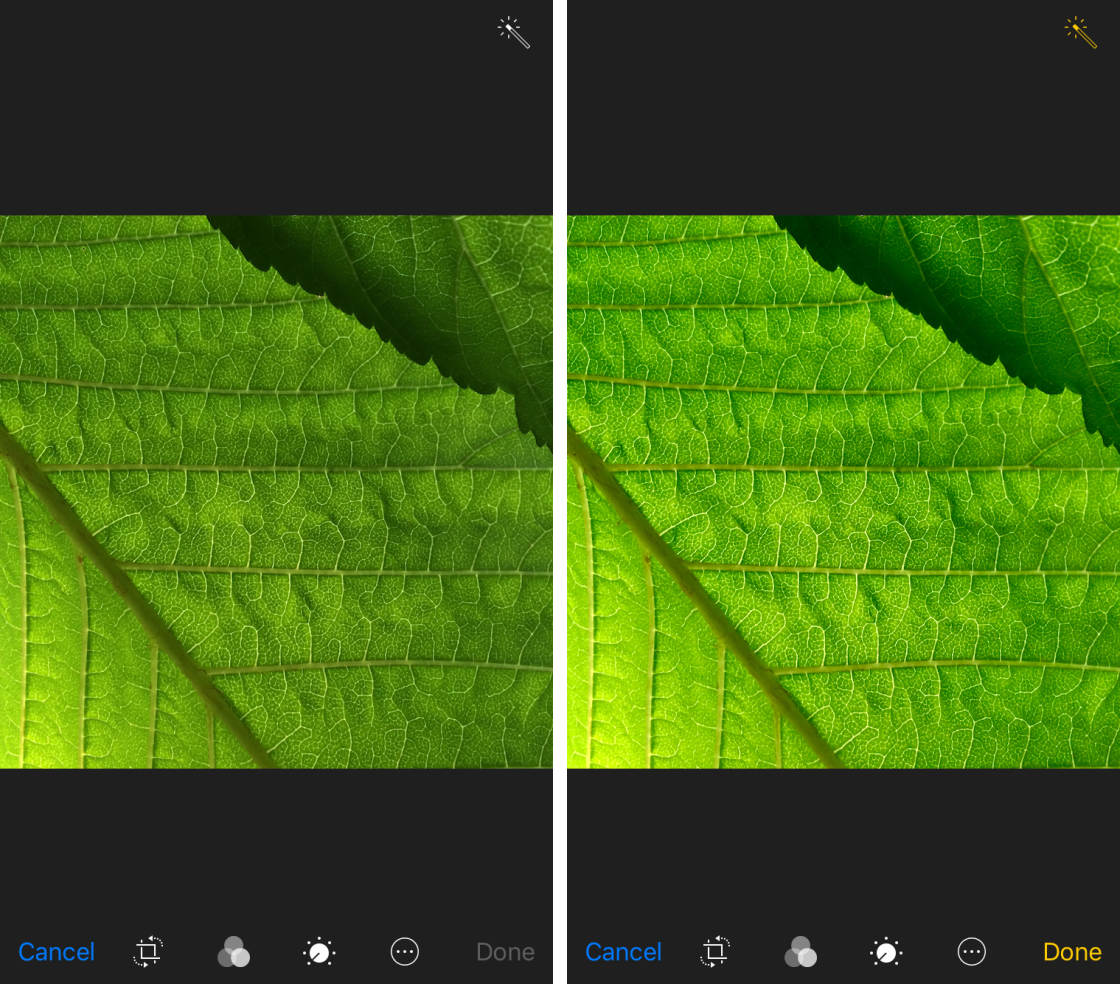
4. Auto-Enhance
Sometimes all your photo needs to make it pop is a quick light or color correction. You can let the Photos app do this for automatically with the Auto-Enhance tool.
Auto-Enhance analyzes your photo, then applies light and color changes to improve your image.
In Edit mode, tap the Auto-Enhance icon (wand) at the top right of the screen. The icon turns yellow when switched on.
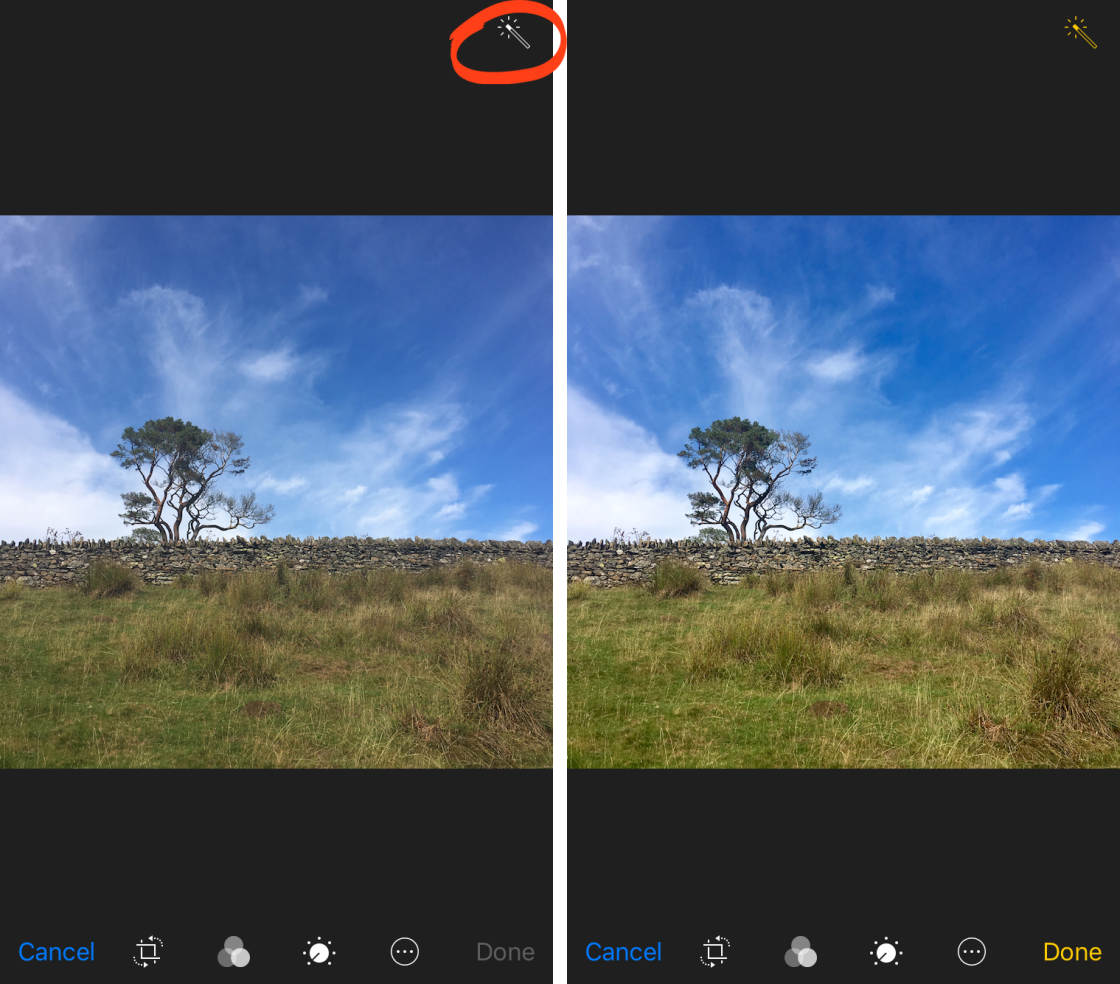
If you don’t like the changes that it makes to your photo, tap the Auto-Enhance icon again to undo the edits.
Often, the Auto-Enhance adjustments are quite subtle. Sometimes this is all a photo needs. But you can also use this as a starting point for making further manual edits.
Keep Edit mode open to apply further edits, or tap Done to save the changes.
The 7 Best iPhone Photography Apps
There are thousands of excellent photo apps on the App Store, and the things you can do with apps are absolutely incredible. With that said, the number of photo apps out there is overwhelming, and it's really hard to know which apps are worth getting.
- Get link
- X
- Other Apps
Comments
Post a Comment